Smartphone cameras today are so good that you can not only take a highly-detailed picture of a document, but probably zoom right down to the ink dots. So why are we using scanners at all any more? Well, your camera app just doesn’t have the same functions as scanner software. Luckily you can scan documents to Google Drive using a neat tool in the app that most people probably don’t know about!
How Is This Different From Photographing Documents?
The big advantage that a document scanner has over a smartphone photograph isn’t detail or quality. It’s the fact that the scanner holds the document in a precise way and offers perfect, consistent lighting with every scan. Also, it captures the image exactly perpendicular to the paper. When you take a photo with your phone, the page might be distorted, show a bunch of unwanted objects around it and be poorly lit. Manually correcting for all these problems would take a lot of time and effort. Not great if you want results that look close to what a flatbed scanner achieves. Google has used its software development talents to quickly and almost automatically compensate for the shortcomings of smartphone camera scanning.
What You’ll Need
To scan to Google Drive using the Google Drive app, there’s a very short list of things you’ll need:
A smartphone or tablet (with a camera) running Android or iOSA Google accountA flat surface with decent lightingA page, book or other document you want to scanAn internet connection
If you’ve got everything on this list, we’re ready to walk you through the process of scanning to Google Drive from your phone.
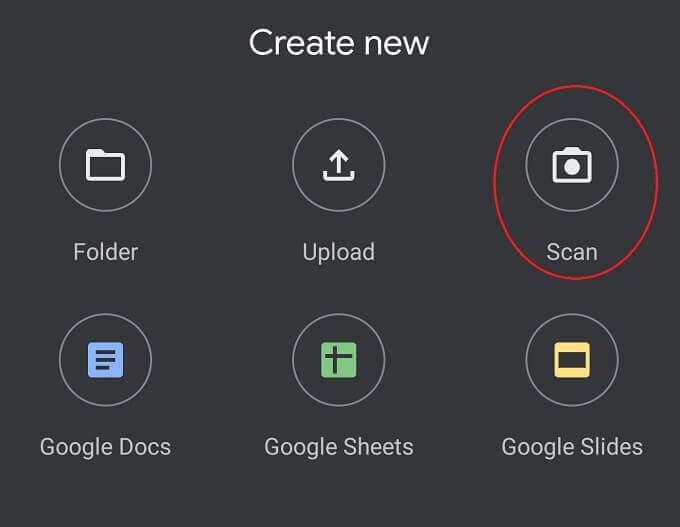
How to Scan to Google Drive with Your Phone
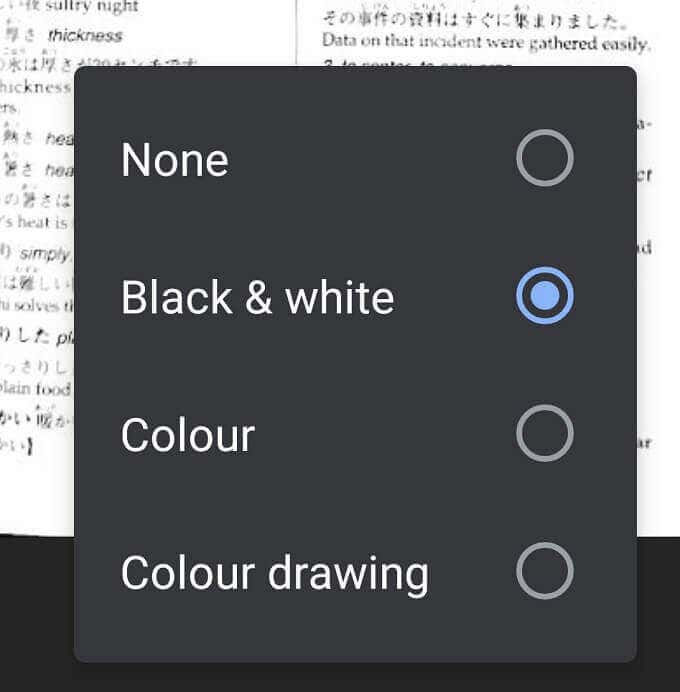
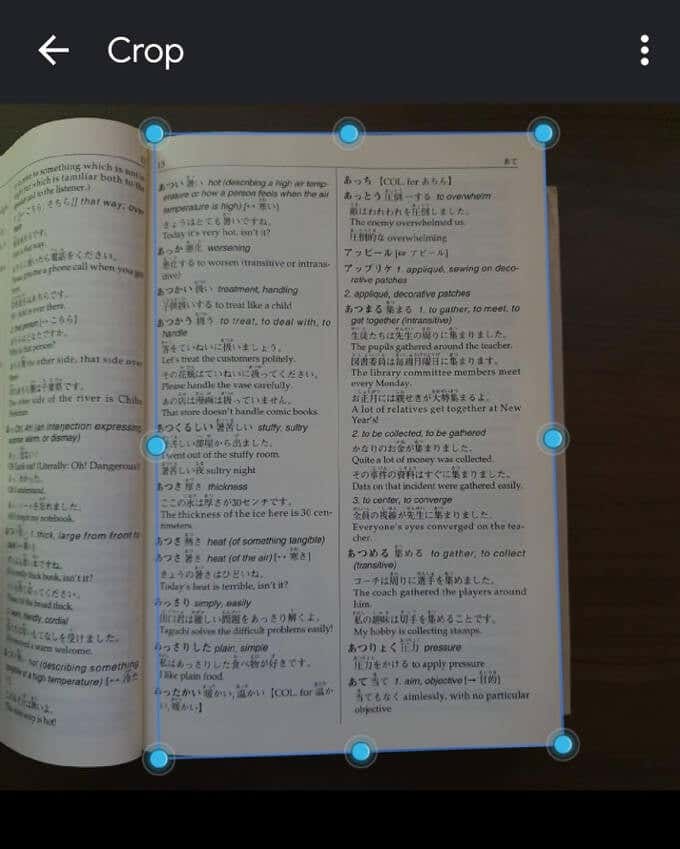
Assuming you’ve already installed the Google Drive app and have logged in to your Google account, here’s how to scan a document: Tap the large white shutter button to scan the page. Now you’ll be asked to save the document as a PDF on your Google Drive account. Give it a name, choose which Google account it should be saved under and then pick a location for it.
Where Are My Documents?
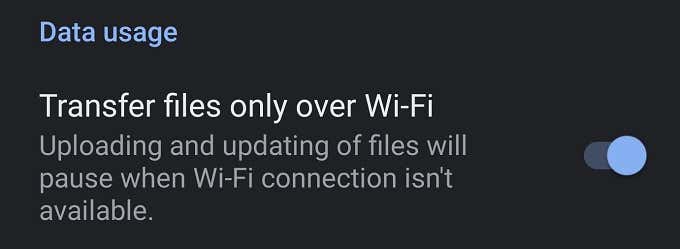
When you first scan a document with the Google Drive app, you’re creating a scan that’s local to your phone’s storage. If you’re on a WiFi connection, that scan will be automatically uploaded to whatever Google Drive folder you specify. Depending on your app settings, uploads may also happen via mobile data, but by default Drive waits for WiFi before uploading any files from your phone to the cloud. This also means that you won’t be able to share your scans with anyone until you’ve connected to WiFi. If you absolutely must get those scans safely in the cloud as quickly as possibly, you have to change the setting in Google Drive to allow for mobile data uploads. Be warned that this can eat a large chunk of your data cap. You’ll probably want to change the setting back after completing your upload. To enable mobile file uploads: When your critical uploads have completed, be sure to turn this setting back on or run the risk of huge mobile data bills at the end of the month.
Tips for Getting the Best Results
While the technology behind Google Drive’s scanning function is pretty impressive, there are a few things that you can do to help make the results even better.
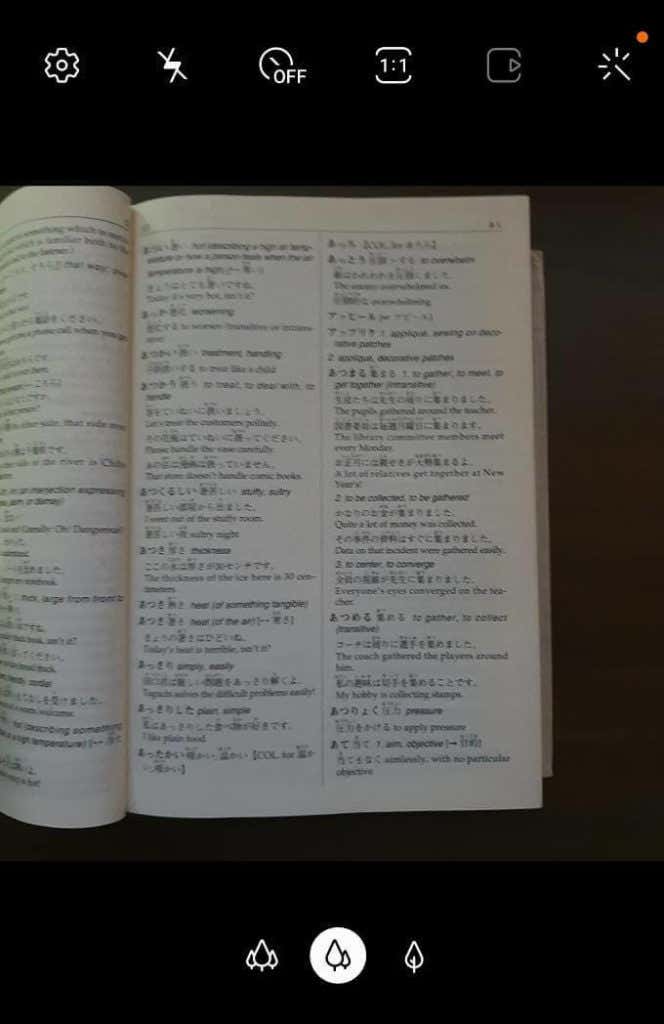
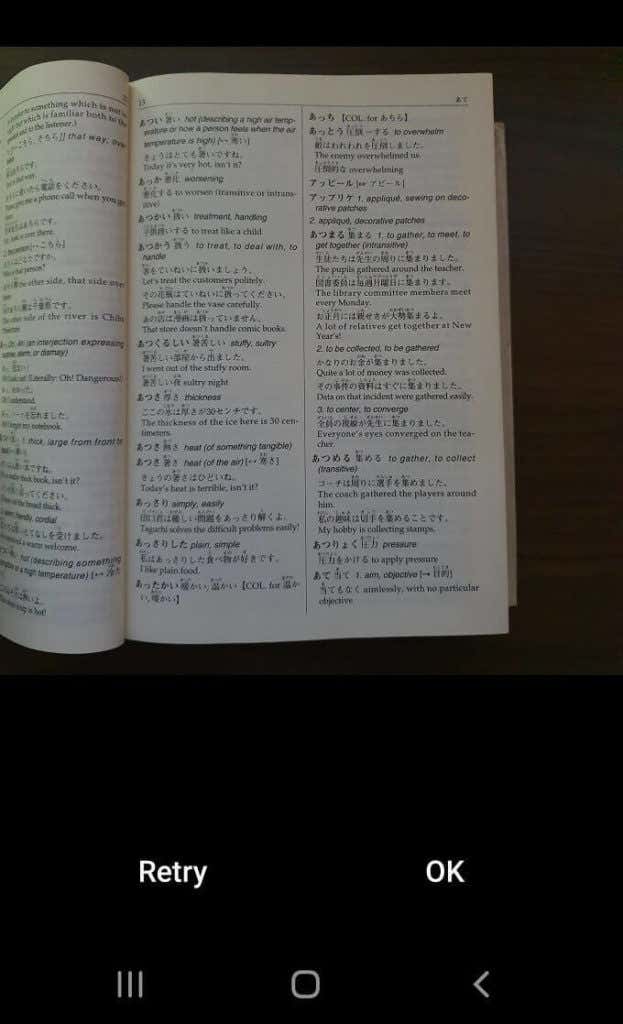
First, make sure there’s enough light! Your camera needs light to work. Even expensive flagship smartphone cameras aren’t going to do a great job in low-light conditions. The Google Drive app does let you switch on the flash in a pinch. The problem is that the harsh built-in flash is likely to cause glare on the paper. So you’re better off using a soft diffuse light such as the overhead fluorescents. Just don’t position your phone directly beneath the light, or you’ll cast a shadow on it.Straighten the document out as much as possible. A flat document will scan well, but one that’s folded or crumpled makes it hard for the software to get a good scan. It can even help to place it inside a transparent folder, as long as it’s not too shiny.
Next, make sure the document is in focus. This is pretty simple on most phones. Just tap on the document and the phone’s autofocus should do the job. Once again, better light means better autofocus performance.While it’s not as convenient, if you have a phone tripod mount or some way to hold the phone steady over the document scanning area, it’ll also make for better results. This is especially useful if you have lots of pages to scan.
Finally, if you’re trying to scan the pages of a book, there are two ways to get a good scan. One is to alternate the book laying on its back or front cover. So that the left or right page is nice and straight for scanning. Alternatively, why not scan the book two pages at a time? Just make sure you rotate each image correctly to make it easy to read.
A Lean, Mean, Scanning Machine
That’s all you need to know to scan documents to Google Drive with your phone. At least, until you run out of space. If you do want to increase the amount of drive space you have for your Google services, check out our article on Google One and find which of the packages might be the right one for you.