For some, this can also be a curse. Posting too many personal things online can backfire, unsurprisingly, causing endless amounts of frustration. Friends can just as easily become enemies with the wrong like or follow, and your brand can crumble before your eyes for the same reasons. Social media can be rather cutthroat if you let it. For that reason, it’s a good idea to know how to rid yourself of it in an attempt to wipe the slate clean. We’ll be discussing how to disengage from your account, leave groups, and delete a Facebook page.
How To Delete a Facebook Page
There are plenty of reasons for ridding yourself of your Facebook account — pages and all. Spending too much time actively engaged online can lead to poor social skills in real life. Perhaps the friends you’ve met online aren’t as interesting or fun as those offline. Maybe you no longer have a reason to use Facebook at all and just want to wash it all away. Whatever your reasons, cleansing yourself of the social media taint has been made much easier in recent years. But before you delete a Facebook page and distance yourself from the social platform, it’s a good idea to save all of the information sent and received over the years, including posts and images, just in case you want to hold onto the memories. Once they’re gone, they’re gone for good so do so before jumping the gun.
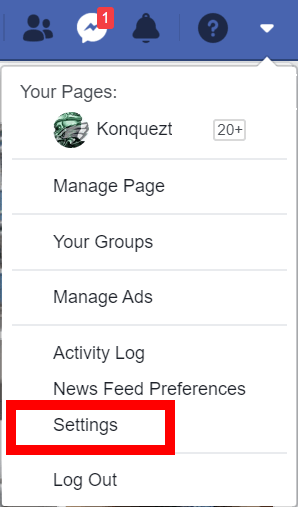
To download a copy of all your Facebook information, go to Settings.
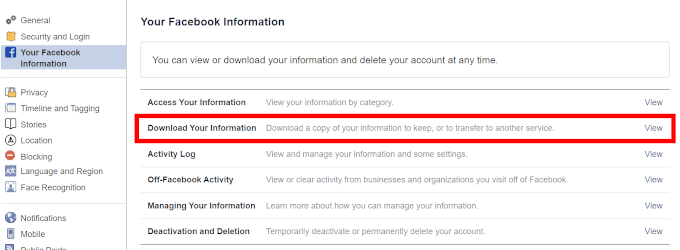
From the left side menu, click Your Facebook Information.Follow this by clicking Download Your Information.
Checkmark all of the data that is important enough for a copy and click Create File.
Before we go full destruction mode, we’ll begin with something less severe, like how to delete a Facebook Page.
Delete A Facebook Page Using Desktop
In order to delete a Facebook Page, you have to be the creator of that Page. So, attempting to sabotage someone else will only end in heartache for you.
If you no longer care for your Page and wish to delete it from existence go to your Page, and click Settings from the menu.Stay on the “General” tab and scroll down in the main window.Similar to pre-deletion of your Facebook Account, it may be a good idea to download a copy of your Page.Click Download Page, to have it open up a larger dialog.
From here, click the Download Page link.
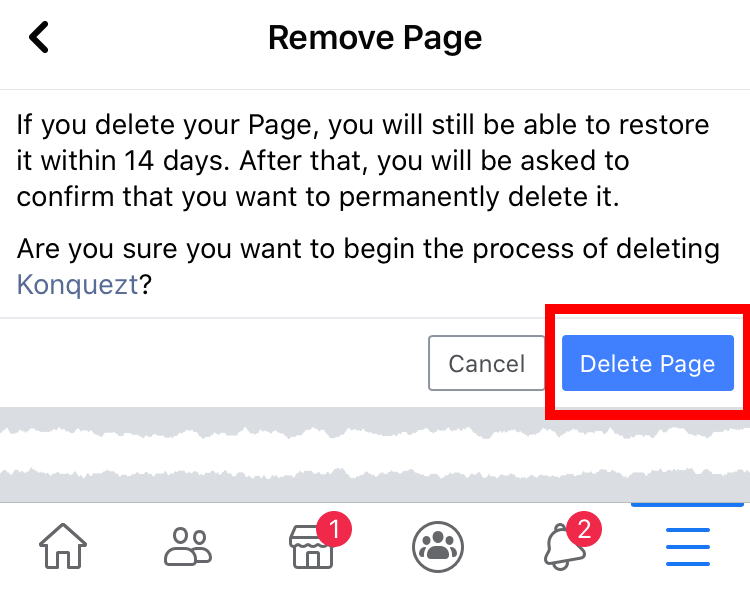
Once your Page info has been downloaded, you can proceed to delete it.Click Remove Page to open up its dialog. Next, click Delete [Page Name] and finalize it with OK.
Take note that Facebook takes up to fourteen days to delete your Page.
Delete A Facebook Page On Mobile
We’ll be doing this tutorial on an iPhone but have provided accompanying instruction on Android for consistency.
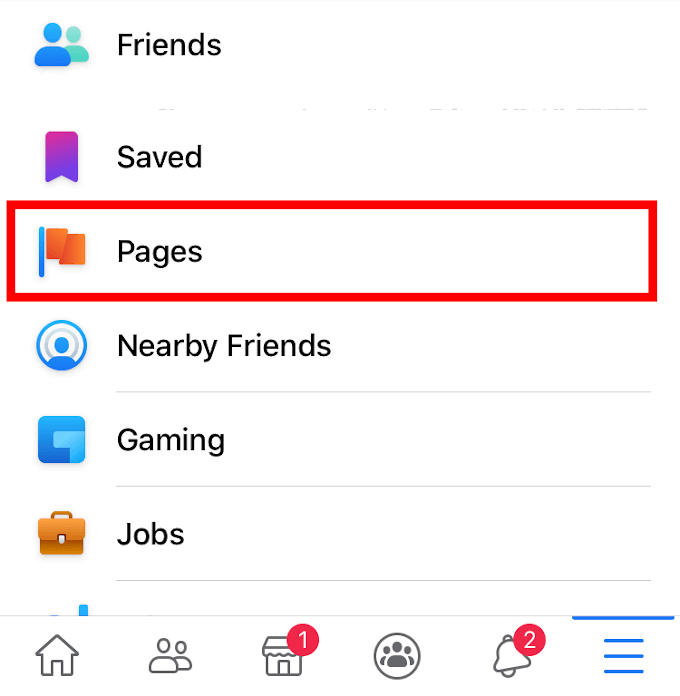
Launch the Facebook app from your mobile device and login.Tap the three horizontal lines to open the menu.For the iPhone, the menu is located at the bottom-right corner of the screen. Android has theirs at the top.Scroll down and tap Pages.
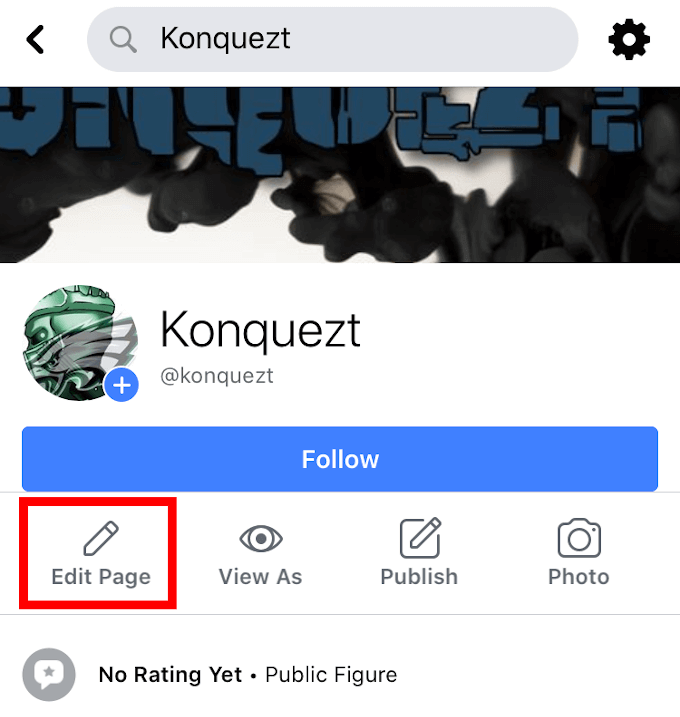
Select the page you want to delete by tapping it. This will open the page.Tap the pencil-shaped icon (Edit Page) just below the page heading to open up a new menu.
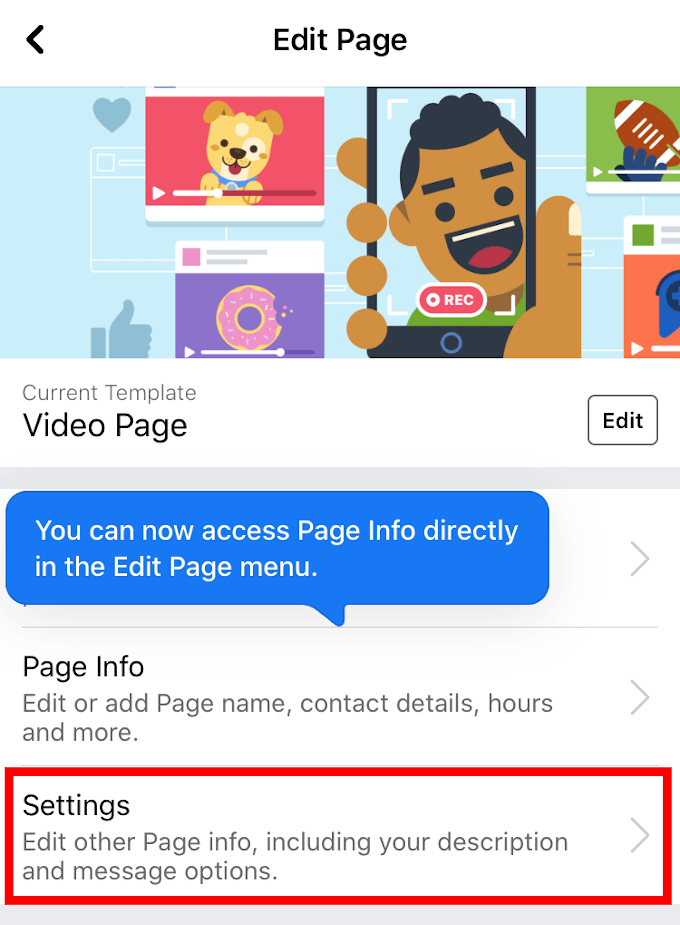
Unable to locate the pencil? Look for and tap the triple dot icon, selecting the Edit Page option.Opens the page’s settings by tapping Settings.
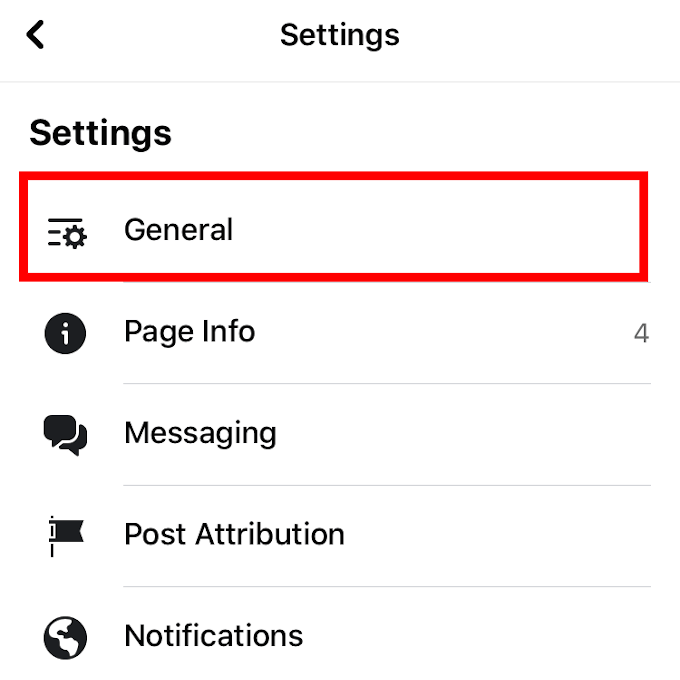
Tap to the “General” tab.
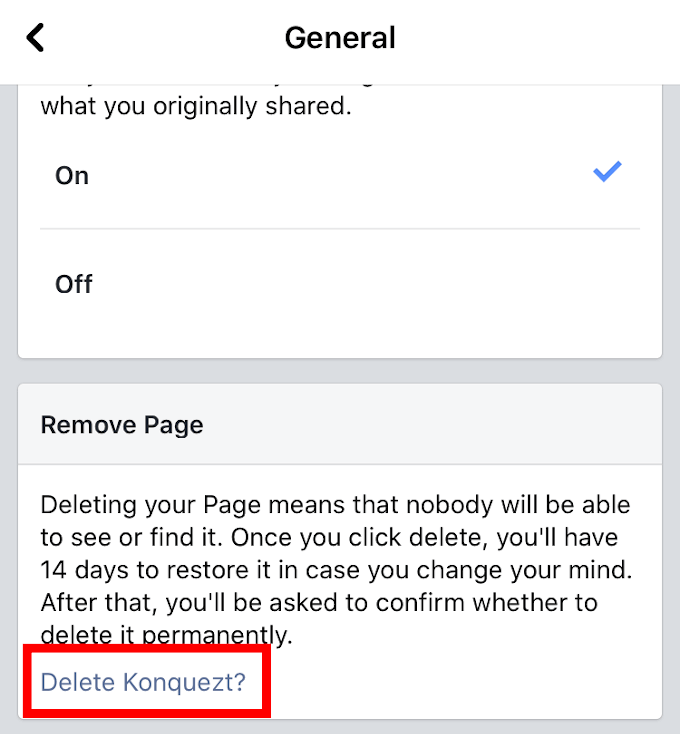
Scroll down to the Remove Page option.
Tap Delete [Page Name].Follow this up with two more taps: One for Delete Page, and the second for OK.
You cannot undo the process, and your Page will be deleted in 14 days.
How to Delete Your Facebook Group
You’ve created a Group and it’s become too toxic that you can’t handle the day to day pressures of being a glorified online babysitter. It’s also quite possible to be the complete opposite and your Group has no one in it and the loneliness has gotten the better of you. Just know that we understand and empathize with your grievance. So, dry your eyes and don’t despair. We’ve got a cure for that. Though, to be fair, if your group has a lot of members, this will be time consuming.
Locate and navigate to the Group you want to delete, and click Members. You’ll have to go through and check off every person’s name in the Group and have them removed by clicking Remove from Group.Once everyone from the Group has been removed, next to your name click Leave Group.Confirm by clicking Leave and Delete.
Congratulations, the Group is vaporware.
How to Deactivate A Facebook Account
Perhaps completely removing your Facebook Account is a bit too hasty a thing. After all, you still enjoy using it but feel like taking a long and necessary break. You can put your account on standby until returning from your hiatus by choosing to deactivate instead.
Head into Settings.Click over to the “Your Facebook Information” tab, and click Deactivation and Deletion.
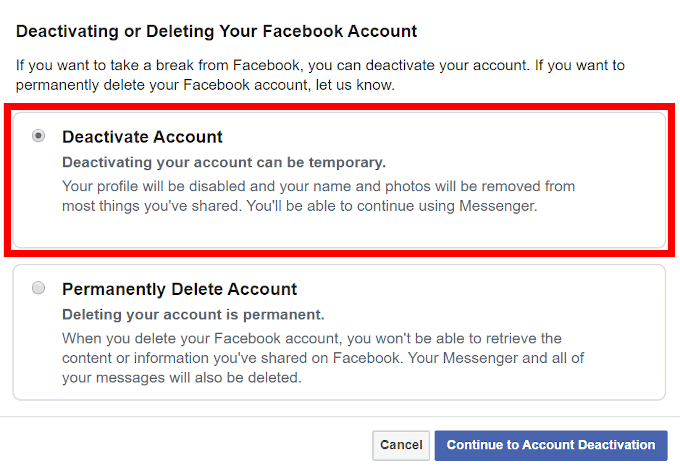
Choose Deactivate Account and click Continue to Account Deactivation.
You’ll be prompted for a password. Enter your Facebook password into the box to continue.Choose a “reason for leaving” from a handful of options, then click Deactivate.
How to Delete Your Facebook Account
You’ve come to the realization that Facebook is no longer the social media platform for you and it’s time to call it quits. Either that, or you want to wash away the sins of a current account in favor of a new one where not everyone knows your name. Regardless, the process is the same.
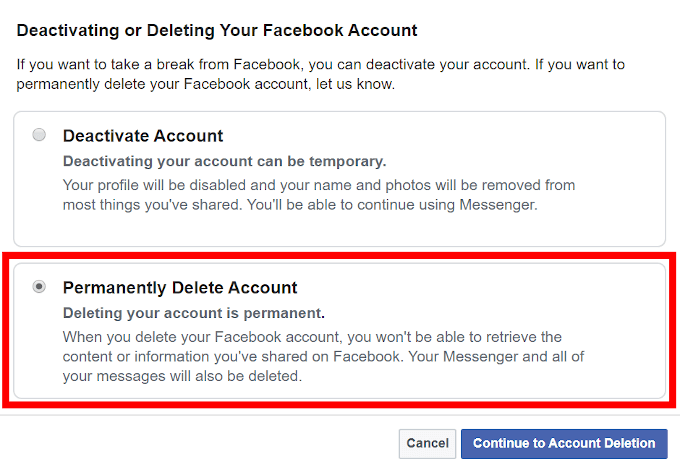
You can follow every step of the deactivation process previously mentioned up to the point of choosing between Deactivate Account and Delete Account.A quick refresher to avoid scrolling up: Settings > “Your Facebook Information” tab > Deactivation and Deletion.This time select Permanently Delete My Account.
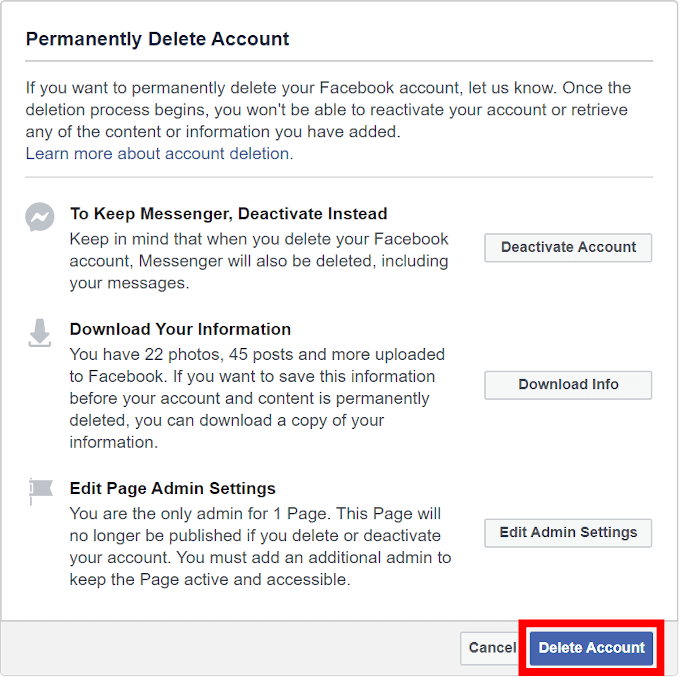
A new window will provide you an opportunity to keep Messenger by deactivating your account instead, as well as download your information. We highly recommend the latter.
When ready, click Delete Account and enter in your password and click Continue to confirm.
Facebook will let you know that it will take some time before the process can be completed. Around 30 days as recent as this article post. You cannot log back into your account during the process or risk renewing the 30-day processing period. This means you’ll need to redo all steps for deletion over again. Remember that if you think there’s a chance you’ll want to reopen your Facebook account in the future, choose to deactivate instead of deleting it. Deactivate keeps all of your account information, photos, and settings intact while remaining invisible to friends and strangers alike. You can reactivate at any time.
