If you have thousands of rows, manually deleting blank lines is a major pain and virtually impossible. The most common way to delete blank lines in Excel, at least as mentioned online, is to use some sort of Excel macro. However, if you’re not familiar with macros, this method can be difficult to implement. Also, if it doesn’t work properly, you may have no idea how to change the macro for your particular Excel file. In this article, I’ll show you a couple of ways you can delete blank rows in Excel and the advantages and disadvantages for each method. Note that these methods will work for any version of Excel, from Excel 2003 all the way to Excel 2016 and beyond.
Method 1 – Add Sorting Column
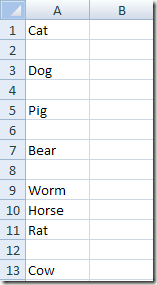
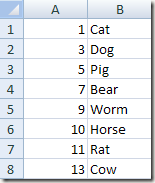
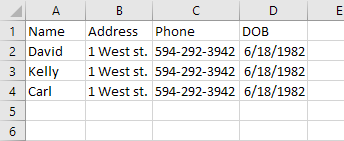
Luckily, there is a simple and very effective way to delete blank lines without any macros. It basically involves sorting. Here’s how you do it. Let’s say we have the following set of data in Excel and we want to get rid of the blank lines:
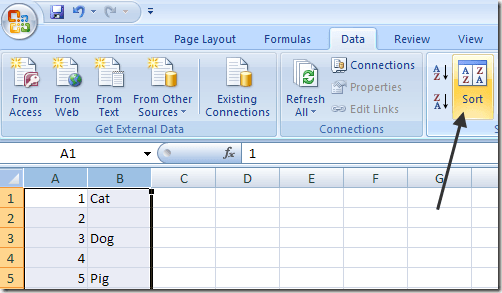
The first thing we’ll do is insert a column and number it consecutively. You might ask why we would want to do this? Well, if the order of the rows matters, when we sort Column A to get rid of the blank lines, there will be no way to get the rows back in the order they were before sorting. Here’s what the sheet should look like before we sort the animal name column:
Now select both columns and click on the Data ribbon in Excel. Then click on the Sort button on the Data tab.
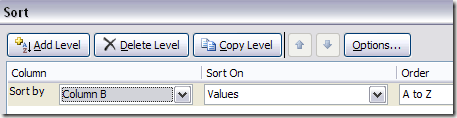
For Sort By, choose Column B and then click OK. Note that you want to sort the column that have the blank values in it. If more than one column has blank values, just pick one.
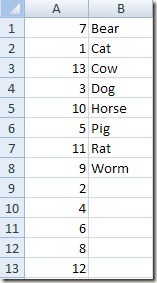
Now your data should look like this below. As you can see, it’s easy to delete the blank rows because they are all at the bottom:
Once you delete the rows, now you can probably see why we added the column with the numbers? Before sorting, the order was “Cat, Dog, Pig, etc..” and now it’s “Bear, Cat, Cow, etc…”. So just sort again by column A to get the original order back.
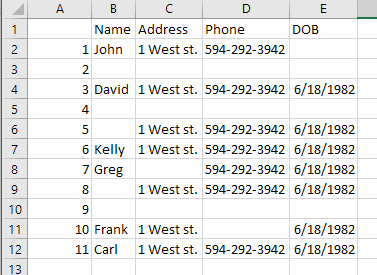
Pretty easy right? What I like about this method is that it’s also really easy to delete rows that only have one column with blank values rather than the entire row being blank. So, what if you need to check on multiple columns rather than just one? Well, using this same method, you would just add all the columns in the Sort by dialog. Here’s another example I created:
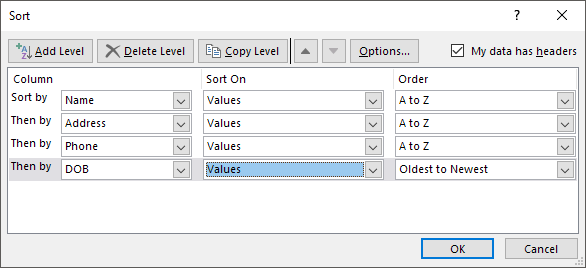
As you can see, this sheet is more complicated. Now I have several rows that are completely blank, but several rows that are only partially blank. If I just sort by column B, I won’t get all the completely blank rows at the bottom. After adding the numbers, select all five columns, and clicking on Sort, you can see I added four levels to the Sort by option.
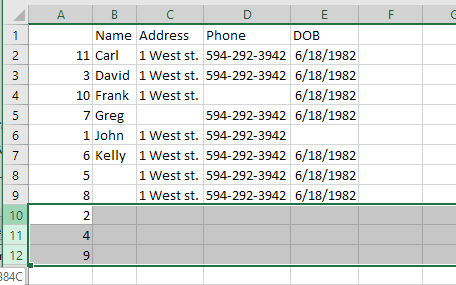
When you do this, only the rows where all four of the columns I added are blank will show up at the bottom.
Now you can delete those rows and then go ahead and resort the rest of the rows to get them back into the original order they were in.
Method 2 – Using Filters
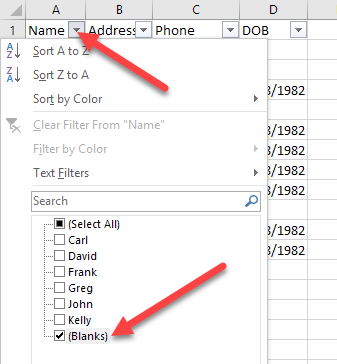
In a similar way to using the Sort function, we can also use the Filter option. Using this method, you don’t have to add in any extra column of anything like that. Just select all the columns that need to be checked for blanks and click on the Filter button.
You’ll see a dropdown arrow appear next to each title in the header row. Click on that and then uncheck Select All and check Blanks at the bottom.
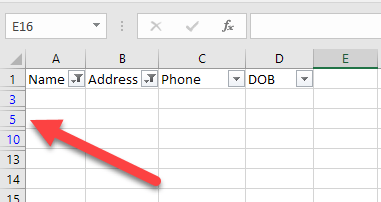
Now do the same thing for each column in the worksheet. Note that if you get to a point where there are only blank rows showing, then you don’t have to select blanks for any of the remaining rows as it’s already checked by default.
You will see the number for the blank rows are highlighted in blue. Now just select those rows, right-click and choose Delete. Once they are gone, just click on the Filter button again to remove the filter and all of your original non-blank rows should reappear.
Method 3 – Delete Any Blanks
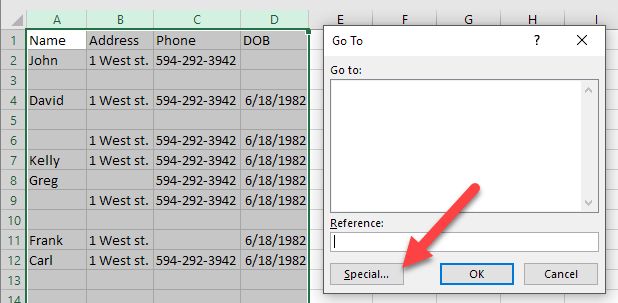
One other method I wanted to mention will delete any row that has either a completely blank row or any row that has even a single blank column. This is definitely not for everyone, but it could be useful if you want to delete rows that have only partial data. To do this, select all the data on the sheet and press the F5 key. This will bring up the Go To dialog, where you want to click on Special.
Now select Blanks from the list and click on OK.
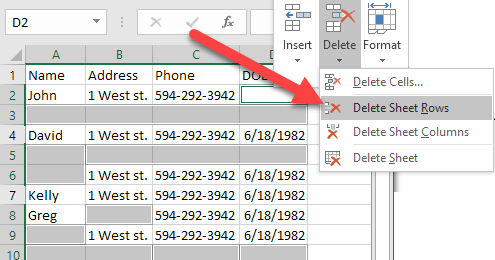
You’ll see all the blank cells or rows will be highlighted in grey. Now on the Home tab, click on Delete and then choose Delete Sheet Rows.
As you can see, this deletes any row that has even a single blank cell in any column.
This isn’t useful for everyone, but in some cases, it’s quite handy also. Choose the method that works best for you. Enjoy!