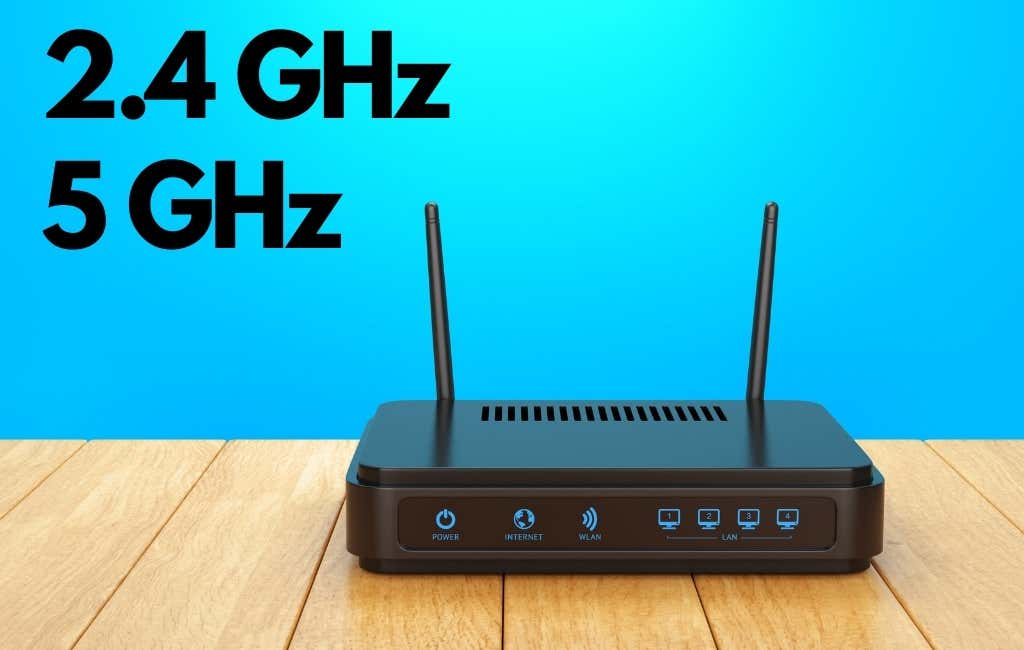
Usually, your devices will switch between whichever band works best at the time, but if you have a reason to lock a device to one band or the other, here are the various ways to do it.
Set a Band Preference in Windows
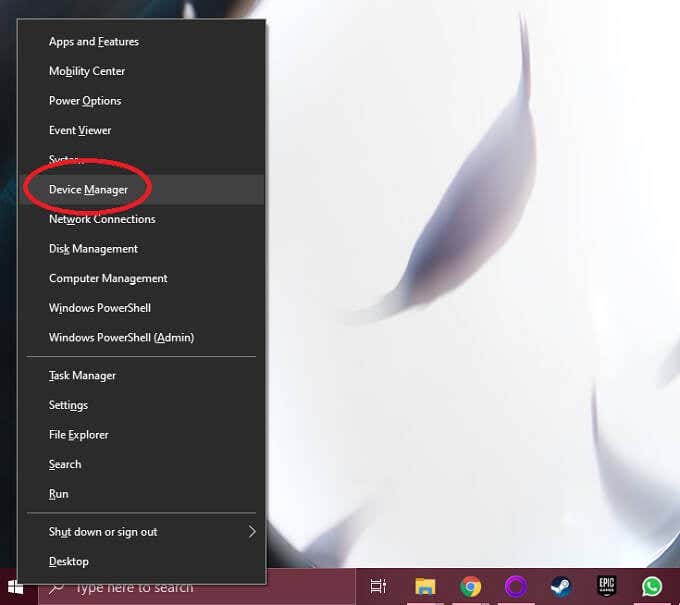
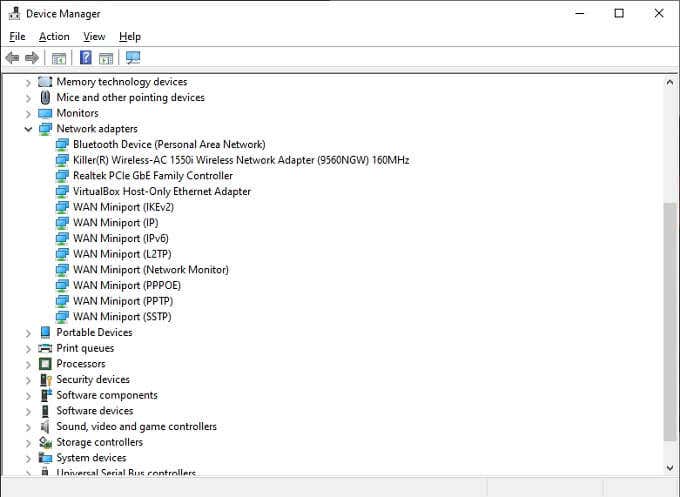
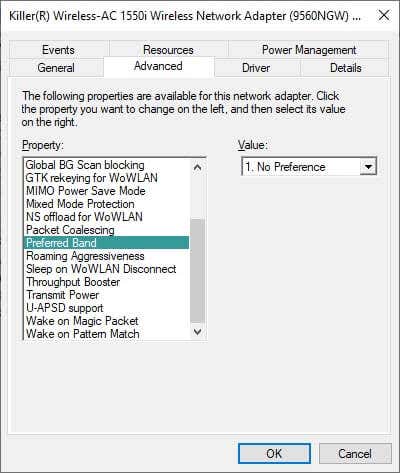
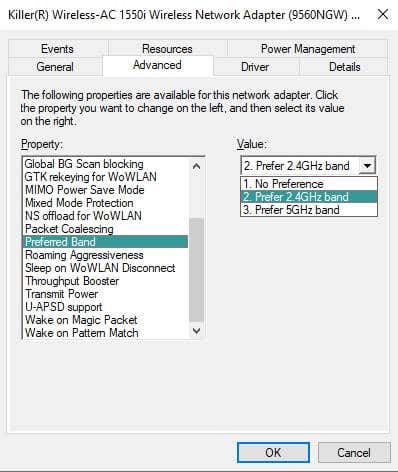
In Windows, you can set which band a Wi-Fi adapter should use. Do note that the language seems a little different depending on the version of Windows you’re using as well as the specific network card. For example, sometimes the property is called “band” and the setting lists “2.4 GHz Only” or “5GHz Only” instead of using the term “preferred.”
Set a Band Preference in macOS
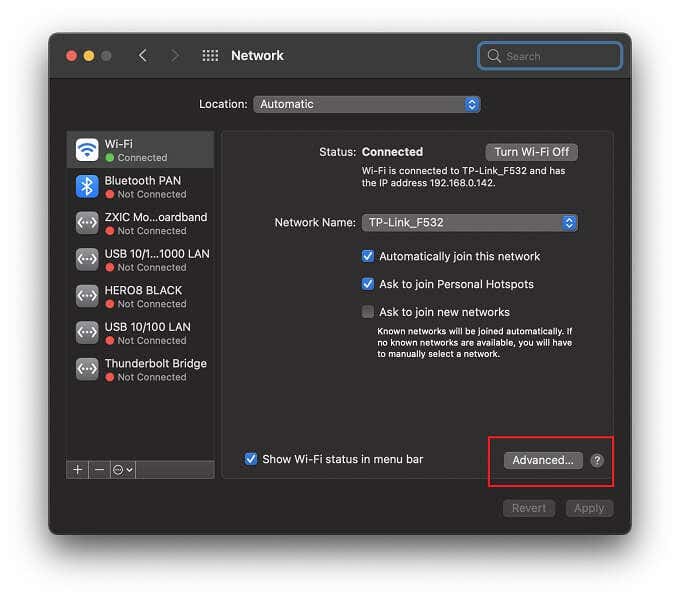
If you’re using a Mac and want to make sure that the computer connects to the network of your choice, you’ll need to change the order of preferred networks. Your Mac will try to connect to the network higher up on the list of preferred networks first before falling back on the next available option. This isn’t quite like forcing the network connection into one band, but as long as your preferred network is available, the Mac will use it over other available options. If you never want your Mac to join a particular network, you can either remove it from the list or untick the Auto-join option next to that network. Then, it will only connect if you specifically tell it to.
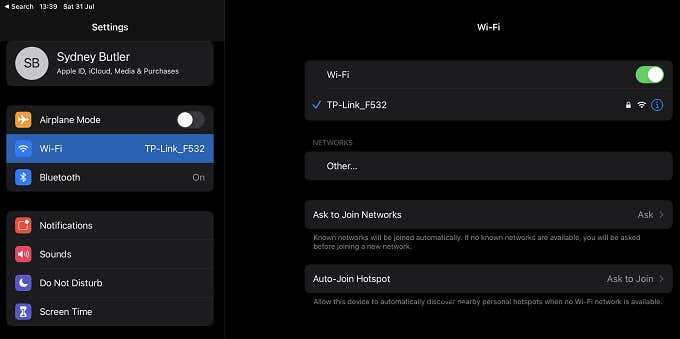
Set a Band Preference in iOS
iOS devices don’t offer the same type of network preference setting as macOS devices, so there aren’t that many options for setting your network preference. On the bright side, the two main options you have in iOS and iPadOS are sufficient to get the job done. Since your 2.4GHz and 5GHz networks have different names, this should be enough to ensure your device only uses one of them.
Set a Band Preference in Android
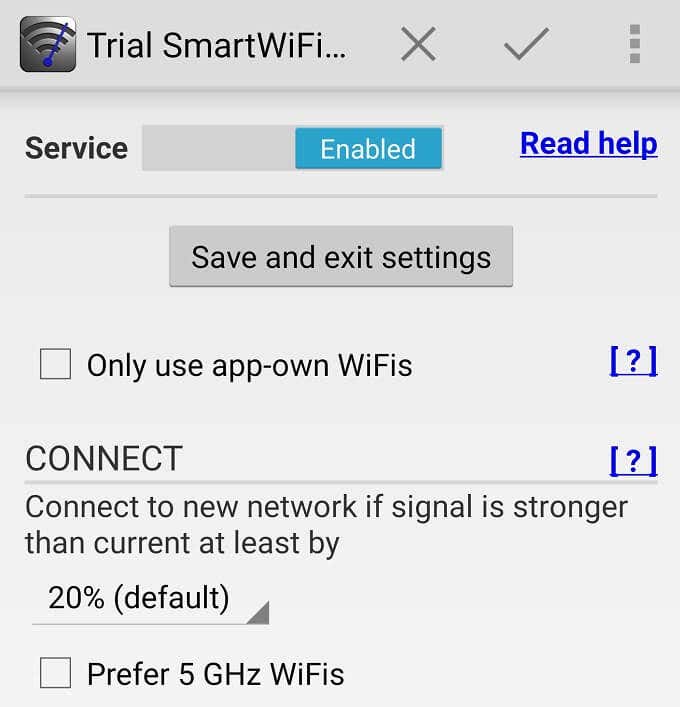
When it comes to Android devices, things aren’t as straightforward as they could be. Some Android phones have a Wi-Fi priority menu. You can find this under: Settings > Network & internet > Wi-Fi > “Overflow Menu” > Advanced Wi-Fi > Wi-Fi priority. If you didn’t know, the “overflow” menu is usually a button with three horizontal bars. In some cases, it may also be in the menu accessed by tapping the three dots. Using the Samsung Galaxy S21 Ultra we had at hand, that setting is nowhere to be found. We suspect that this will be the case for many Android devices with customized, brand-specific versions of Android. As such, the most reliable solution is to use a Wi-Fi switching app. These apps take over control of which Wi-Fi network you’re connected to. Do note that this does involve giving the app high-level permissions. Based on our research, a prime suggestion is Smart Wi-Fi Selector, which is a paid application. However, the developer does offer a free trial so you can make sure it works for you. Note: Take care to only use apps you find on the Play Store that are verified by Play Protect, and have a look at our Android antivirus list to test any such app you install. Pay attention to user reviews as well to ensure the app works as described.
Disable a Band on Your Router Settings
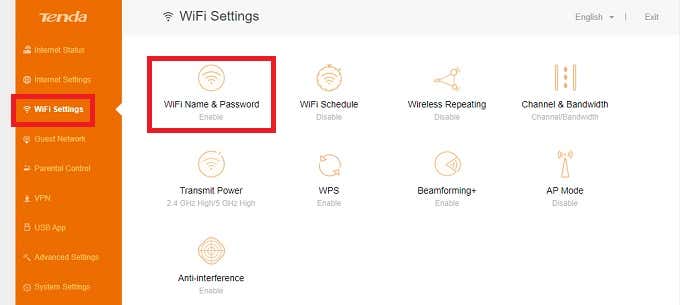
In some cases, you may not want any device to connect to one of the frequency bands that your router offers. The most foolproof method would be to disable one band or the other entirely. Just keep in mind that some older devices cannot connect to a 5GHz network at all, so if you do disable your 2.4GHz network, that’s likely to cut certain devices out. Every router or Wi-Fi access point has its brand-specific interface and menu arrangement. So you’ll have to refer to your router documentation for exact information. Nonetheless, the basic process is more or less universal. Now that you’ve switched off the band you don’t want, there’s no way any device can connect to it.
Give the Networks Different Passwords
If you want a device locked to one band or the other, then there’s a simple trick to pull it off. All you have to do is open your router settings and then give each band its password. Then, on the device itself, make sure to forget the network you don’t want it to use. Connect to your desired band, and then it shouldn’t be a problem anymore.
Consider Ethernet
If the device you want to limit to a specific band doesn’t need to be moved around, ethernet cabling may be better than messing around with Wi-Fi settings. If the idea of laying cable and drilling holes in walls is daunting, you also have the option of using powerline Ethernet extenders, which are a plug-and-play solution. Check out Wi-Fi Extenders vs. Powerline Adapters for more information.