You can invoke the MBR2GPT tool using Command Prompt, and two commands later, you’ll have switched from Legacy BIOS to UEFI.
Which Is Better: Legacy BIOS vs. UEFI
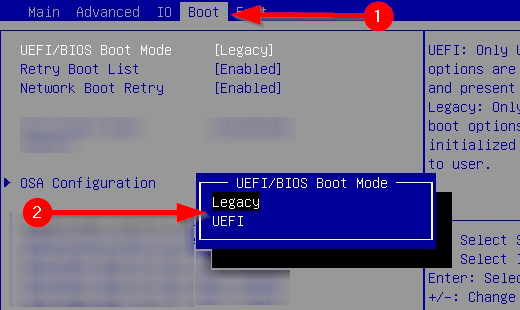
BIOS (Basic Input/Output System) is a piece of code that your microprocessor requires to start up after you press the computer’s power button. BIOS first appeared long ago and worked perfectly well. BIOS did have some constraints though. For instance, BIOS uses Master Boot Record (MBR) to define a maximum partition capacity of 2.2 TB. Hardware developments over the past decade and a half warranted a new firmware. Then came UEFI (Unified Extensible Firmware Interface). UEFI, much like BIOS, is low-level software that your computer runs when you press the power button and before booting the OS. UEFI is more robust and removes constraints associated with BIOS. For instance, UEFI supports partitions of up to 9 ZB, offers faster boot time, and provides security features like “Secure Boot.”
Getting Ready to Convert Legacy BIOS to UEFI
You need to get a few things in order before we talk about changing BIOS from Legacy to UEFI.
Check Your BIOS Version
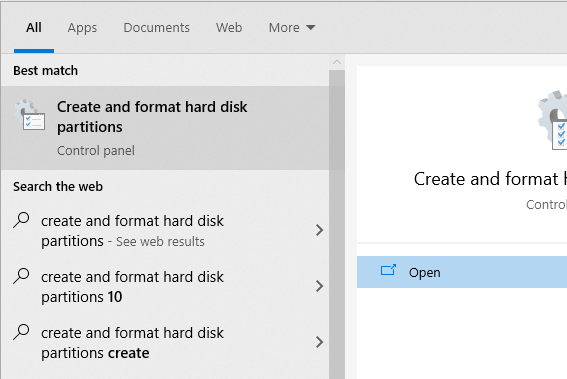
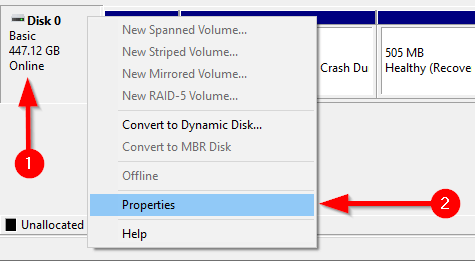
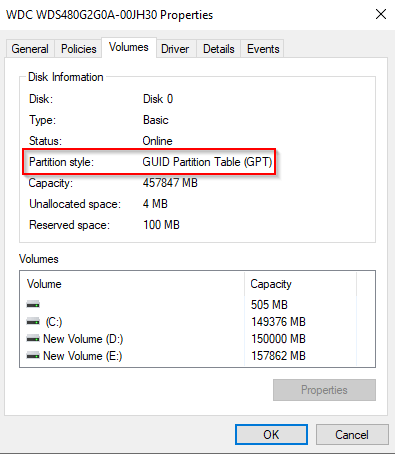
Verify that you’re currently using Legacy BIOS. You don’t want to have to go through the entire process only to find out you were using UEFI the whole time. Open the Disk Management app to verify which BIOS version you’re running. Search for Create and format hard disk partitions in the Start Menu and open the Best match. This will take you to the Disk Management app. In the app, right-click on the disk on which you’ve installed Windows and select Properties. Next, you want to check your disk partition style to confirm whether you’re running the Legacy BIOS or UEFI. If you’re using BIOS, your disk partition style will be MBR. If you’re already on UEFI, the disk partition style will be GPT. You can check the disk partition style under the Volumes tab in Properties. Search for Partition style under Disk information.
Check Your Windows Version
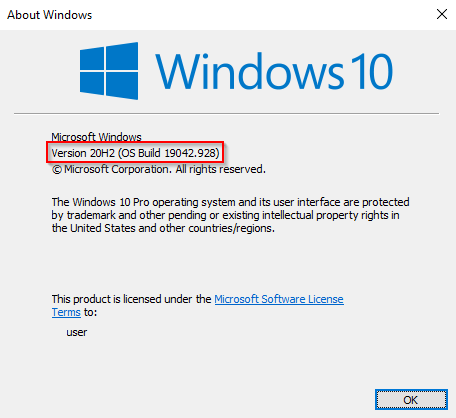
The MBR2GPT tool is available on Windows 10 version 1703 and later. Verify that you have the right version before starting the process by searching for winver in the Start Menu and opening the Best match. The new window that opens will display the version in the second line.
Legacy BIOS to UEFI Conversion Prerequisites
Assuming you’ve verified that you’re using the Legacy BIOS, there are a few other things you need to check, and in some cases, change.
How to Change BIOS from Legacy to UEFI
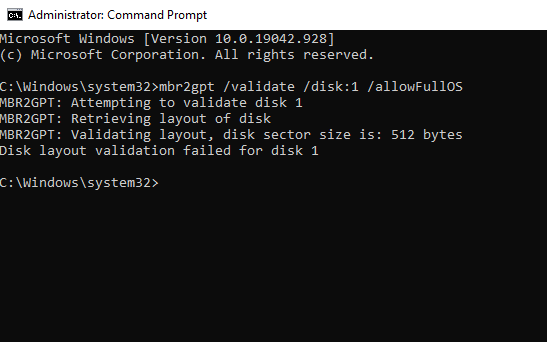
Once you’ve made sure everything is in order, it’s time to use the MBR2GPT tool. mbr2gpt /validate /disk:0 /allowFullOS If the disk you want to convert is not disk 0, replace 0 with the appropriate disk number. If your disk doesn’t meet the conversion requirements, you’ll see an error. For instance, the following error resulted from validating a USB drive. mbr2gpt /convert /disk:0 /allowFullOS Let the conversion run, it should only take a few seconds.
Enjoy Your Modernized BIOS
UEFI comes with a lot of capabilities. Given that most modern systems are using UEFI, it’s only natural to want to convert Legacy BIOS to UEFI. Well, you’re all done. Fortunately, you didn’t have to reinstall Windows either.