They have a free version called FileMover Lite, which basically restricts you to one moving rule. If you want to have multiple moving rules for different folders or different schedules and different file types, etc, then you would have to shell out $200+ for the single PC edition! That price is ridiculous for consumers, but if you’re using this for your company or IT department, it’s definitely worth the cost. It’s the most advanced file copier/mover program I have seen to date. Once you install it, you will be overwhelmed by the massive number of features and options. You can pretty much do anything you want with this program in terms of moving, deleting and copying files automatically. It also works with other non-local locations such as HTTP, AWS, SQL databases, etc.
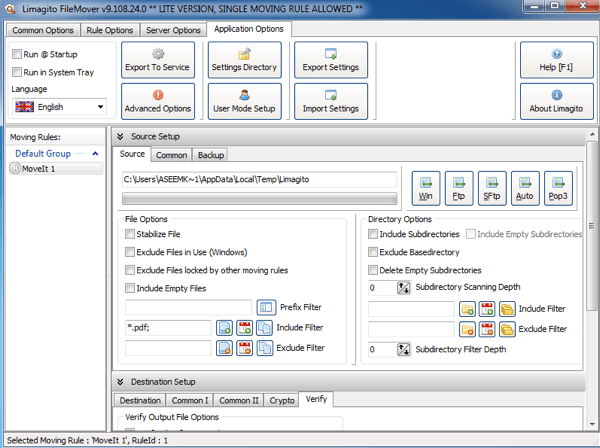
First off, you can check the two boxes at the top left to Run @Startup and Run in System Tray if you don’t want to install the service. If you want it to run as a Window service, which would negate the need to have it running in the system tray, you can click on Application Options tab at the top and choose Export to Service. Of course, you want to do that after you have configured the moving rule with all of its options. Next, there is one important thing to understand. Common Options are options that will be applied to all rules (only 1 if you are using the free version) and Rule Options are applied to each individual rule you create. Now that you understand that, let’s get started.
Under Common Options, you can set the scan time, which is set to 5 seconds by default. This means the source directory will be scanned every 5 seconds. Time Schedule will let you set up a schedule if you don’t need the directory scanned all the time. Mail Setup will let you add your email account like Gmail so that you can send out notifications on certain events like errors or success, etc. You can also scan a network drive by clicking the Network Drive button and adding the folders. Below that is the meat of the program. Here you can configure the source, the destination and all of the filters and settings you could ever imagine. Let’s start with the source.
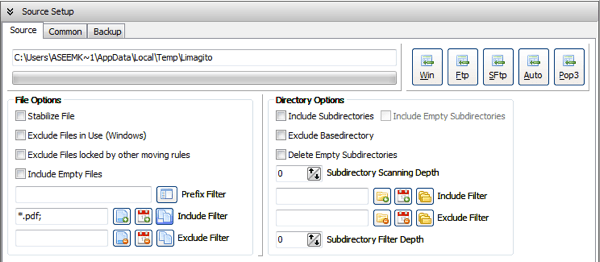
At the top, is Source Setup and it has three tabs (source, common and backup). You can either choose a Windows directory by clicking the Win button or you can even have a source like FTP, SFTP, and POP3. Under File Options, you can do things like exclude files in use and filter on file name, file size and file date. For example, if you only wanted to move PDF file, you could like on the FileName button, which is the leftmost button next to Include Filter.
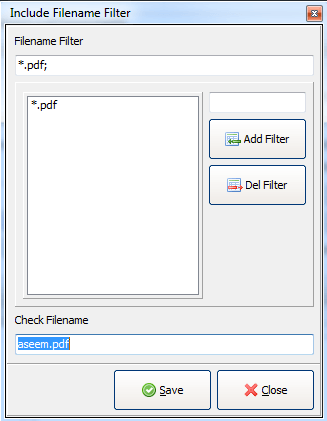
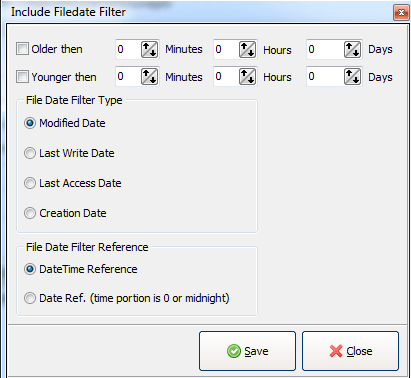
To filter by file extension, you have to type in *.ext; and then click Add Filter. The box under Check Filename will turn green if what you type there matches the filter and red if it doesn’t. For FileDate filter, you can choose files older than a certain date and choose a filter type from Modified Date, Create Date, Last Access or Last Write date. This is great if you want to automatically delete files older than a certain date.
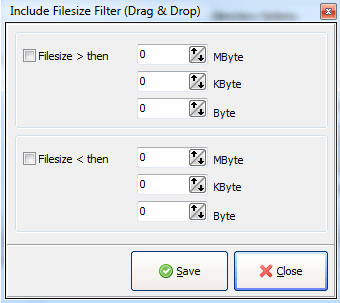
Lastly, the FileSize filter will let you filter the files by the size. So you can set it up to move only really large files or delete files smaller than 100 KB, etc, etc.
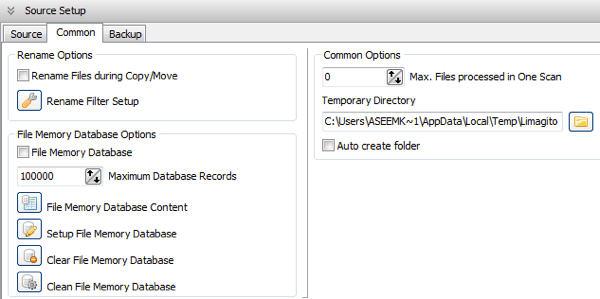
Under Directory Options, you can choose to include subdirectories, exclude the base directory, or even choose a subdirectory scan depth (0 will scan infinitely). You can also setup include and exclude filters on the directories and even choose to what subdirectory level you want to apply the filters! Wow! If you click on the Common tab under Source Setup, you can also do other things like rename the files during the copy or move. Click on that button and you can setup complicated regular expressions to rename files any way you like. You can also check the File Memory Database option if you want to keep a record of every file that was moved or copied or deleted for viewing later on. This could be useful if you need to know when a file was moved, etc.
The Backup tab basically lets you create a backup of all the files as they are moved/copied/deleted. You can check that out on your own if you need to. Now for the Destination Setup.
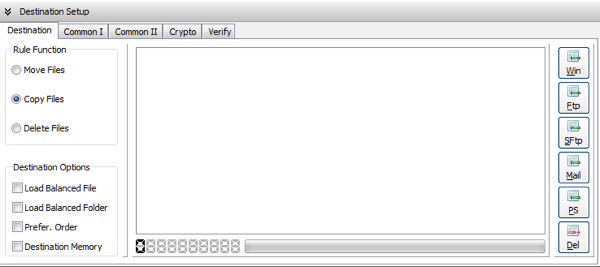
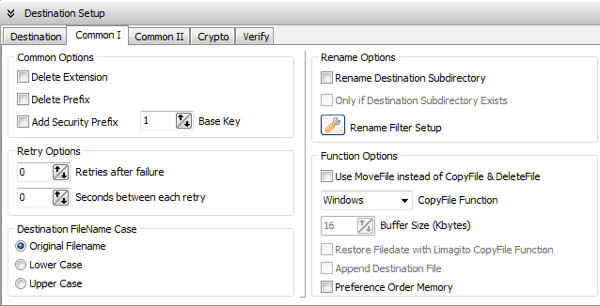
Here you can choose whether to move, copy or delete the files and where you want them to be stored. Again, you can choose a Windows directory for the destination, a FTP/SFTP server, or even a mail server! If you click on Common I, you can do things like delete the file extensions, change the filename case, and setup rename filters.
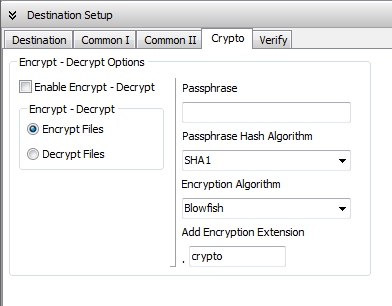
Common II just has an option for load balancing and for storing the actions into a database. Under Crypto, you can choose to encrypt the files as they are transferred to the destination directory.
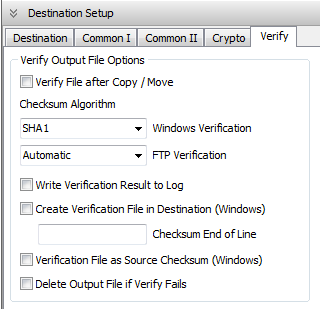
The Verify tab is useful as it will let you check to make sure the transfers were done properly. You can also write it out to a log file or delete the file if the verification fails.
There are a lot more advanced options available in this program, but this article was to get you started with a general idea. It’s an amazing little app and if you do a lot of file moving/deleting/copying, it might be worth the cost to purchase the full version so you can create as many rules as you like. Enjoy!
